
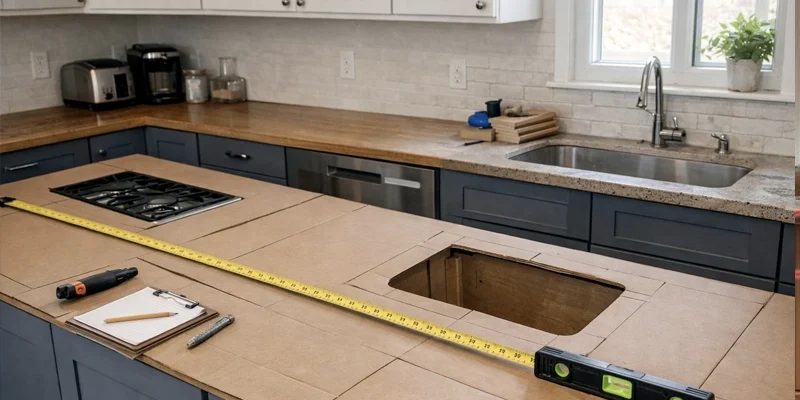
After countertop templating, the project moves from field measurement into review, layout and fabrication planning. The countertop is not normally cut the moment the technician leaves the site. The recorded geometry and project details must first be checked and converted into an approved production plan.
This process may include reviewing cabinet conditions, confirming sink and cooktop specifications, determining countertop piece divisions, planning seams, positioning templates on the selected slab and preparing files for cutting and edge fabrication.
The exact workflow varies by material, fabricator and project complexity. A simple vanity, a large veined island and a kitchen with waterfall ends will not follow an identical production sequence.
Quick Answer
Once countertop templating is complete, the measurement data is reviewed against the approved project specifications. The fabricator then develops the piece layout, cutouts, seams, edges and slab placement before production begins. After cutting and finishing, the pieces are inspected, prepared for delivery and installed on ready cabinets. Unresolved details or changes to the measured site can pause this sequence.
In This Guide
At the end of the appointment, the technician should have a record of the countertop geometry and the project details available at the site. Depending on the measuring method, this record may include a digital file, physical template, written dimensions, photographs, product information and installation notes.
Digital files can be transmitted electronically to the office or fabrication team. Physical templates must be labelled and transported without changing their shape.
The project record may include:
This information is organized so another team member can understand what was measured and how the finished components are expected to relate to the site.
A field measurement usually requires professional review before it becomes a fabrication file. The measured geometry must be compared with product specifications, material requirements and the approved design.
If the template contains missing, conflicting or unclear information, the project should be paused for clarification rather than interpreted during cutting.
The installed dimensions may reveal conditions that were not apparent on the original plan. For example:
These findings do not necessarily indicate a measurement problem. Templating is the stage at which the actual site conditions replace earlier assumptions.

Before fabrication begins, the measured geometry should be checked against the specifications that define the finished countertop. This review helps ensure that the drawing, selected products and installed conditions describe the same project.
Sink, cooktop and fixture information is reviewed against the measured location and available cabinet space. The exact model matters because similar-looking products can require different openings or clearances.
The review may verify:
Finished-edge locations, countertop thickness and mitred or laminated details must agree with the template. Island overhangs and waterfall panels should also be checked against the cabinet and floor conditions recorded at the site.
A thick-looking edge or vertical waterfall component can require additional slab pieces and different fabrication steps. These details should not be added after the main pieces have already been cut.
The measured countertop may need to be divided into multiple fabricated pieces because of slab size, pattern, cutouts, handling or delivery access. Each planned seam should be evaluated for support, appearance and installation practicality.
The final seam position may not be approved at the site because it can depend on the actual slab layout. The field template supplies the dimensions and cabinet conditions required to make that decision.
| Review Item | Why It Is Checked | Possible Result |
|---|---|---|
| Installed dimensions | Confirms the geometry is complete and internally consistent. | Approve, clarify or remeasure |
| Sink and cooktop | Verifies product-specific cutouts and cabinet clearance. | Approve or obtain revised specifications |
| Overhang and support | Checks that the proposed extension has a defined support plan. | Approve or coordinate additional support |
| Seams | Coordinates slab size, cabinet support and installation. | Confirm or revise piece divisions |
| Edge construction | Determines required pieces, clearances and finishing work. | Finalize production details |
| Delivery access | Tests whether planned pieces can reach the installation area. | Keep one piece or introduce a planned seam |
Fabrication Should Wait for Required Approvals
Once the material is cut, many changes become difficult or impossible. Missing product information, unresolved seams and unconfirmed design details should be addressed before production begins.
After the template and specifications are reviewed, the project is organized into the pieces and operations required for production.
The fabrication plan identifies each countertop component and how it connects to the others. A project may include:
The plan can include final cutout geometry, edge profiles, mitred components, faucet holes, seam preparation and labels used during fabrication and installation.
Digital files may connect with CAD and CNC workflows, but the production team still needs to apply the correct material, tooling and fabrication requirements.
The completed piece layout helps determine how much slab material is required. Slab quantity depends on more than total countertop area. Pattern direction, defects, seam matching, waterfall components and usable slab dimensions can affect material yield.
Once the fabrication pieces are defined, they can be positioned on the selected slab or slabs. This is where aesthetic decisions about veining and pattern flow become part of the production plan.
The next sections explain slab layout, cutting, edge fabrication and quality checks before delivery.
Once the countertop pieces have been defined, they must be positioned within the usable area of the selected slab or slabs. This step is commonly called slab layout or nesting.
Slab layout affects pattern direction, seam appearance, material yield and whether special components such as waterfall ends can be cut from the available material.
The fabrication plan should be based on the material allocated to the project. Published slab dimensions and small samples are useful during design, but they do not show the exact usable area or full pattern of every slab.
Before cutting, the fabricator may review:
Natural granite, marble and quartzite require individual slab evaluation because colour, movement and natural features vary. Engineered surfaces can offer greater consistency, but their pattern, slab format and available production batch should still be confirmed.
Templates can be arranged to balance appearance, fabrication requirements and material use. A layout optimized only to minimize waste may not produce the best vein placement, while a highly specific pattern arrangement may require additional material.
Priority areas often include:
The fabricator also needs sufficient material between parts for cutting and edge preparation. Templates cannot simply be placed against one another without accounting for the production method.
Veins can run along a countertop, across an island or through a mitred transition. The intended direction should be evaluated from the main viewpoints in the room and coordinated with adjoining pieces.
For countertops that turn a corner, perfect vein continuity may not be possible because the pieces are cut at different orientations. The objective may instead be to create a balanced transition and avoid abrupt or distracting pattern changes.
A waterfall end uses a vertical piece connected to the horizontal countertop, often with a mitred joint. Achieving visual continuity requires the horizontal and vertical templates to be positioned together during slab layout.
This may reduce slab yield or require a second slab. The guide to waterfall kitchen island countertops and pattern layout explains how mitred joints, edge construction and vein direction interact.
Seams are planned with both the slab and installed cabinets in mind. A visually preferred seam still requires adequate support and practical installation access.
Seam planning may consider:
For oversized islands, avoiding every seam may be less practical than introducing one carefully supported joint. Additional guidance is available in the article about large kitchen island countertops, slab sizes and delivery.











Slab Layout Balances Several Priorities
Reducing waste, centring a prominent vein, matching a waterfall and minimizing seams may not all be possible within the same slab. Establish the visual and technical priorities before the cutting layout is approved.
After the layout and production information are approved, the project moves into fabrication. The specific equipment and sequence depend on the selected material, shop capabilities and required details.
Slabs may be cut using CNC saws, saw-jet systems, waterjet equipment or other professional stone-fabrication machinery. The cutting file or physical template guides the shape of each component.
The fabrication team must account for:
Cutting is only one stage. Newly formed edges and openings still require finishing, inspection and preparation for installation.
Cutouts are produced using the approved product information and their confirmed position within the template. Corner geometry and remaining material around the opening must follow the requirements applicable to the selected surface.
Large openings can create narrow sections that are more vulnerable during handling. Depending on the material and project, temporary reinforcement or a specific transportation method may be required.
Exposed edges are shaped and finished according to the approved profile. Common work can include easing sharp edges, forming decorative profiles, polishing exposed surfaces or assembling a built-up edge.
A mitred edge requires separate pieces to be cut and joined accurately. The visible thickness may be greater than the structural thickness of the main slab, so its construction must follow the approved design.
Edges that will form a field seam are prepared so the installer can align and join the pieces at the project site. Seam quality depends on fabrication accuracy, cabinet support, adhesive selection, pattern alignment and installation conditions.
A seam should not be described as invisible. Its visual prominence varies with surface colour, movement, finish, lighting and the quality of the completed joint.
Short backsplash pieces, window sills and related components may be produced with the countertop. Full-height slab backsplashes may follow a separate measurement and fabrication sequence if their dimensions depend on the installed countertop.
Before the pieces leave the fabrication shop, they should be checked against the project information and prepared for safe transportation.
Critical dimensions, cutouts and connections can be compared with the approved template or production drawing. Each piece should be identifiable so the installation team understands its intended location and orientation.
Quality control may include reviewing:
Depending on the project and fabrication shop, adjoining pieces may be positioned together before delivery to check alignment, seam preparation or pattern relationships. This does not replace the final dry fit on the installed cabinets, but it can identify some issues before transportation.
Fabricated pieces are heavy and may contain narrow sections around cutouts. Edges and corners should be protected, and pieces should be supported using appropriate professional handling and transportation equipment.
Large or irregular components may require temporary reinforcement. The transportation plan should also reflect the access conditions recorded during the site visit.
Quality Control Does Not End at the Shop
Shop inspection confirms the fabricated pieces before delivery. Installers must still dry-fit the countertop, verify cabinet conditions and inspect each piece again before permanent installation.
Once fabrication and shop checks are complete, the project can move into installation scheduling, site preparation and delivery.
Installation can be scheduled after the required approvals, fabrication and quality checks are complete. The project site must also remain ready to receive the fabricated pieces.
Cabinets, finished panels, sinks, supports and appliance openings should remain consistent with the conditions recorded during templating. Notify the fabricator if any measured component has been moved or modified.
Before delivery:
Countertop installers may need access inside cabinets to join seams, secure sinks or inspect support. Plumbing and electrical reconnection should be coordinated with the appropriate trades.
Large pieces are normally transported upright and may require considerable room to turn before being lowered onto the cabinets. Keep doorways, hallways, stairs and the area surrounding the cabinets unobstructed.
Temporary furniture, newly installed light fixtures or construction materials added after templating can create an access problem even when the original route was suitable.
The installation team transports the labelled pieces to their intended locations and checks for visible transportation damage before permanent placement. Narrow areas around cutouts and exposed edges require careful handling.
Pieces are positioned without final adhesive so the installers can check general fit, cabinet support, wall clearances and seam alignment. Minor site fitting may be possible, but extensive cutting should not be treated as a substitute for accurate fabrication.
After the dry fit is accepted, the countertop is secured using installation materials appropriate to the surface and support structure. Field seams are aligned, joined and finished while supported by the cabinets or approved framing below.
Sinks and additional components are installed according to the project scope and applicable product requirements. Plumbing connections are normally completed after the countertop and sink installation by the appropriate trade.
The completed installation should be reviewed for:
Required curing or waiting periods vary with the adhesive, sink-mounting method and project specification. Follow the installer’s instructions before reconnecting fixtures or applying loads.
Countertop Installation Is Not the Final Trade
Plumbing, cooktop connections, backsplash installation and some appliance work may occur afterward. Coordinate these stages so the newly installed countertop is not altered or loaded prematurely.
The most common avoidable delays occur when the measured project no longer matches the approved fabrication information.
Fabrication or installation may be delayed by:
If a change is necessary, communicate it before fabrication continues. Depending on its effect, the project may require a revised drawing, new approval or another site measurement.
There is no universal timeframe. Material availability, project approvals, slab layout, fabrication complexity, shop capacity and installation access all affect scheduling.
Not necessarily. The template normally undergoes review, production planning and any required approvals before cutting begins.
Do not change it without fabricator approval. A different model may require another cutout, faucet position or cabinet arrangement.
The process varies by fabricator and material. Projects with strong veining, multiple slabs or waterfall components may include a layout review before cutting.
Any adjustment that changes countertop position or support should be reported. A revised measurement may be required.
No. Seams may be required because of slab size, layout, cutouts, pattern, handling, support or delivery access.
The installer evaluates the cause and determines whether an approved minor adjustment is possible. Significant discrepancies may require shop modification, replacement or another fabrication step.
The sequence after countertop templating involves review, slab layout, fabrication, quality control, delivery and installation. Each stage depends on accurate information from the previous one.
Maintaining the measured cabinet layout, confirming project decisions early and reporting changes before cutting helps the complete process remain coordinated.
Planning a Countertop Project?
Explore professional countertop survey, templating and measurement services for projects across Toronto and the GTA.