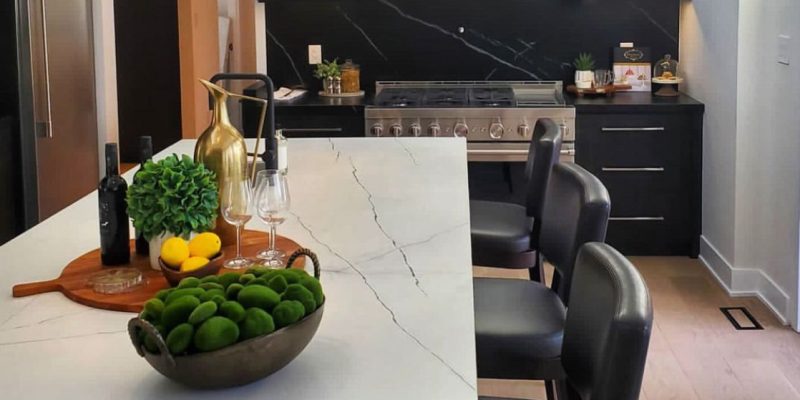
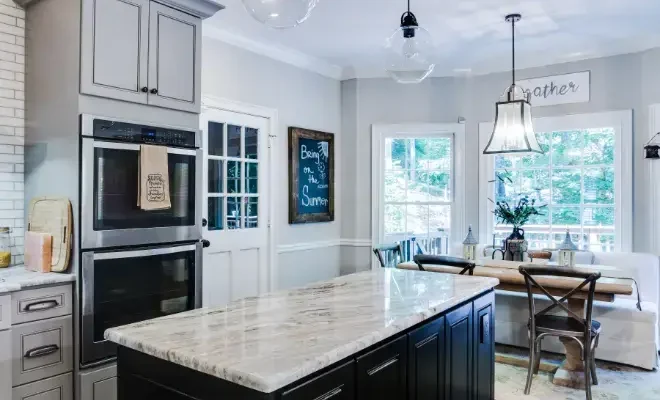
Kitchen island countertop design should begin with function, available space and structural conditions—not with slab colour alone. The countertop must provide useful working area while preserving safe movement, comfortable seating, appliance access and adequate support.
An island can serve as a preparation surface, dining area, storage centre or location for a sink or cooktop. Combining these functions is possible, but every added feature affects the required dimensions, countertop cutouts, cabinet configuration and installation plan.
This guide explains how to plan an island countertop from the room layout outward: first defining its purpose, then confirming aisle clearances, seating, overhangs, support, material suitability, seams and fabrication details. Homeowners ready to discuss a specific project can also explore Teccorp Stone’s custom kitchen island countertop services.
Request a Free Quote
Kitchen Island Countertop Services
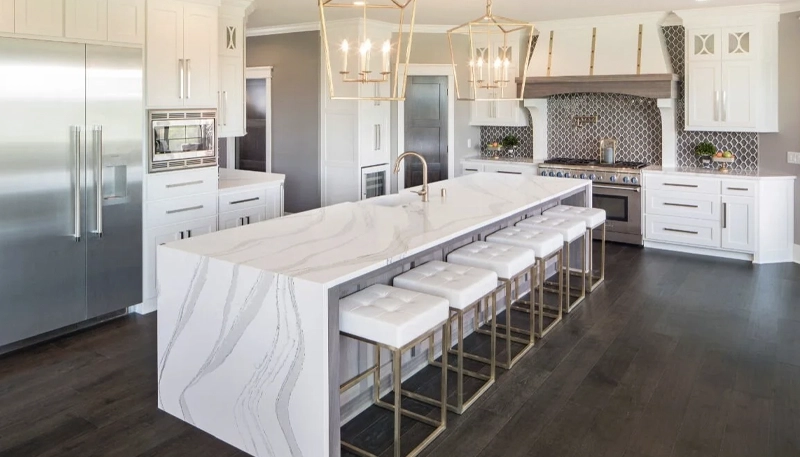
Before selecting dimensions or countertop material, decide what the island must accomplish. An island designed mainly for food preparation has different requirements from one intended for seating, cooking or cleanup.
Listing every desired feature without establishing priorities can produce an oversized island with limited usable workspace. A better approach is to identify one primary function and then add secondary functions only when the room can support them.
A preparation island provides uninterrupted countertop space and storage without a sink or cooktop breaking up the surface. It is often the simplest configuration to fabricate and can preserve flexibility for baking, serving, entertaining and everyday food preparation.
The cabinet layout beneath the countertop should support the way the island will be used. Wide drawers can place utensils, mixing bowls and cookware near the work area, while pull-out waste storage can improve preparation workflow without requiring an additional countertop opening.
A seating island must account for more than the number of stools that fit along one edge. Each person needs sufficient width, knee space and room to enter or leave without interfering with a nearby walkway.
Seating should normally face away from the most active cooking area so guests and children are less likely to enter the primary work zone. The overhang and support system must be planned together; adding deeper seating after fabrication can create structural and cabinet conflicts.
Placing a sink in the island can create an effective preparation or cleanup zone, but it also requires coordination with plumbing, the dishwasher, waste storage and surrounding landing space. The sink cutout removes countertop material and may influence seam placement and reinforcement.
The faucet, soap dispenser, filtered-water tap and air-switch locations should be confirmed before fabrication. Their holes must avoid cabinet rails, sink hardware and support components beneath the countertop.
A cooktop island requires appliance-specific cutout dimensions, safe clearances, suitable ventilation and access to the appropriate electrical or gas service. Downdraft equipment, if specified, can occupy substantial cabinet space and may affect drawers, support and the location of countertop seams.
The countertop material must be compatible with the appliance manufacturer’s installation requirements. Heat-resistant material alone does not resolve ventilation, landing-space or safety concerns.
A large island may combine prep space, seating, storage and an appliance, but the countertop should still retain useful uninterrupted areas. A sink or cooktop placed directly in the centre can divide the surface into narrow sections that are less practical than they appear in a floor plan.
When several functions are required, divide the island into clear zones:
First Planning Decision
Write down the island’s primary function before setting its size. Prep, seating, cleanup and cooking islands require different countertop areas, cabinet configurations, cutouts and clearances.
The largest island that fits into a drawing is not necessarily the largest island that works in the room. Finished countertop dimensions must preserve movement around the island and allow appliances, doors and drawers to operate without conflict.
Aisle clearances should be evaluated from the finished edge of the island countertop to the nearest opposing countertop, tall cabinet, wall, appliance handle or other obstruction. Measuring only between cabinet boxes can overstate the usable space because countertop overhangs and hardware project beyond them.
Check clearances at the narrowest point. Angled walls, refrigerator handles, decorative panels or a projecting range can reduce an otherwise acceptable aisle.
A walkway used mainly for circulation has different requirements from an aisle where a person stands to prepare food, open appliances or work opposite another cook. The following dimensions are useful starting points for planning rather than universal construction rules:
| Area Around the Island | Planning Starting Point | What Must Be Checked |
|---|---|---|
| General walkway | Approximately 36 inches | Traffic volume, doors, stools and projecting handles |
| Work aisle for one cook | Approximately 42 inches | Drawer access, appliance operation and working position |
| Work aisle for multiple cooks | Approximately 48 inches | Passing space and simultaneous use of opposing work zones |
| Aisle facing an appliance | Project-specific | Door swing, manufacturer clearance, landing space and passage behind the user |
| Aisle behind island seating | Depends on circulation | Occupied stool depth and whether people must pass behind seated users |
These measurements should be tested against the actual room, household needs, accessibility requirements and applicable local rules. Additional space may be necessary where an aisle also serves as a major path between rooms.
Open the dishwasher, oven, refrigerator and opposing drawers on the plan. Confirm that a person can operate each item without becoming trapped between the appliance and island. Also check whether two frequently used components can open at the same time.
Refrigerator doors may project farther than the cabinet body, and some models need additional side clearance for full access to drawers. Appliance specifications should therefore be reviewed before the island position is finalized.
An island may be too large when it narrows an important walkway, blocks appliance operation, creates unusable depth or forces people through the cooking zone. Reducing the countertop by several inches can improve movement without materially reducing function.
When adequate clearance cannot be maintained, consider a smaller island, a peninsula or a mobile worktable. A kitchen does not become more functional simply because an island has been added.
Layout Test
Mark the proposed island footprint on the floor, then simulate opening appliances, using drawers and walking behind occupied seating. This simple test can reveal conflicts that are difficult to recognize on a two-dimensional plan.
Island seating should be planned around the people using it, not simply the number of stools that fit beneath the countertop. Seat width, knee space, overhang depth, support placement and circulation behind occupied stools all affect comfort.
The finished seating arrangement should also avoid placing guests directly in the primary cooking path. When possible, separate the social side of the island from the side containing active drawers, appliances or food-preparation areas.
Approximately 24 inches of countertop width per person is a useful planning starting point for many island seating arrangements. Wider spacing may be more comfortable when stools have arms, swivel seats or broad frames.
Dividing the island length by 24 inches does not automatically confirm the seating capacity. Finished end panels, waterfall sides, support brackets and the position of the island base may reduce the space available to each person.
Knee-space requirements vary with counter height, stool design and how long people are expected to remain seated. Counter-height seating generally needs a deeper overhang than raised bar-height seating because the user’s legs extend farther beneath the countertop.
| Seating Element | Planning Starting Point | What Can Change It |
|---|---|---|
| Width per seated person | Approximately 24 inches | Stool width, arms, swivel movement and waterfall panels |
| Counter-height seating | Approximately 36-inch worktop height with about 15 inches of knee space | User height, stool design, cabinet depth and structural support |
| Bar-height seating | Approximately 42-inch surface height with about 12 inches of knee space | Raised-counter construction, stool height and accessibility |
| Space behind occupied stools | Project-specific | Whether people must pass behind seated users and how frequently the route is used |
These are preliminary design values rather than universal rules. Actual dimensions should be tested with the intended stools, support system, household needs and applicable accessibility or local requirements.
Placing all stools along one long side is efficient, but it creates a row in which people have limited face-to-face interaction. Wrapping one or two seats around an end can feel more conversational, provided the corner seat has enough width and does not interfere with a walkway.
Waterfall panels occupy the ends of an island and can prevent end seating. This decision should be made before slab quantity and waterfall fabrication are approved.
An unoccupied stool can fit beneath an overhang while an occupied stool projects much farther into the room. Evaluate the aisle with people seated and allow additional space if the area is also a route to a doorway, refrigerator or adjoining room.
Where circulation is limited, reducing the number of stools may create a more comfortable island than fitting the maximum possible seating capacity.
The overhang creates knee space, while the support system transfers countertop loads safely into the cabinets or island structure. These two elements should be designed together.
A rule such as “this material can always extend a certain distance without support” is not reliable for every project. Safe overhang capacity depends on:
Natural stone, engineered quartz and porcelain products have different technical requirements. Even two products within the same category may have different approved spans or reinforcement instructions.
A thicker-looking edge does not necessarily mean that the entire countertop is a solid slab of that visible thickness. Mitred and built-up edges can create a substantial appearance while the main surface remains thinner.
Cutouts can reduce the amount of material resisting stress. An overhang positioned near a sink or cooktop therefore requires different evaluation from an uninterrupted countertop of the same dimensions.
Where additional support is required, concealed steel brackets, plates or a fabricated support frame may preserve legroom better than decorative corbels. The support must extend into a structure capable of carrying the load; attaching a bracket to a weak panel does not create an adequate system.
Bracket spacing and dimensions should be determined for the selected countertop and island construction. Supports must also avoid interference with cabinet drawers, electrical boxes and finished seating positions.
The support strategy should be established before countertop measurement and preferably before the island cabinetry is finalized. Retrofitting steel after cabinets, panels or flooring are complete can add cost and limit available options.
Overhang Safety Principle
Do not approve a seating overhang from appearance or material name alone.















Material selection should follow the layout decision. The island’s size, cutouts, waterfall panels, edge construction and maintenance expectations can eliminate options that appeared suitable when viewed only as small samples.
The following table provides design-level guidance. For a complete performance comparison, review the dedicated guide to the best countertop materials for kitchen islands.
| Material | Design Strength | Planning Consideration |
|---|---|---|
| Quartz | Controlled colours and patterns simplify coordination with cabinets and perimeter surfaces. | Protect from concentrated heat and follow product-specific support guidance. |
| Granite | Natural variation can make the island a unique visual focal point. | Approve the actual slab, movement, usable area and any sealing recommendation. |
| Porcelain | Thin profiles and controlled designs suit contemporary islands and mitred details. | Exposed edges require careful fabrication, handling and protection from impact. |
| Quartzite | Distinctive natural movement suits statement islands. | Verify the stone identity, slab condition, absorption and fabrication requirements. |
| Marble | Provides classic veining and a natural patina. | Acid etching and visible wear should be accepted as part of the maintenance decision. |
Homeowners deciding specifically between two popular waterfall-island materials can also review the detailed porcelain vs. granite kitchen island comparison.
Every opening removes material from the countertop and introduces coordination with cabinets, equipment and other trades. Appliance and fixture decisions should therefore be finalized before countertop fabrication.
A sink island should provide suitable landing and preparation space rather than allowing the sink to consume most of the usable surface. Confirm the sink model, mounting method, faucet holes and accessory requirements before measurement.
The dishwasher should be positioned so its open door does not block the primary route around the island. Plumbing, waste connections and sink-support hardware must fit within the cabinet without conflicting with countertop supports.
The cooktop manufacturer’s cutout, clearance and ventilation instructions must guide the design. A downdraft system may require substantial space beneath the countertop and can limit drawer storage or interfere with structural components.
Where overhead ventilation is planned, hood position, ceiling conditions and sightlines should be coordinated with the island location. Cooking directly beside guest seating may also create heat, splatter and safety concerns.
Pop-up outlets and countertop charging modules require cutouts and free space beneath the surface. Their locations should avoid sinks, cooktops, drawers, plumbing and support steel.
Electrical work must be planned by the appropriate qualified trade and comply with applicable requirements. The countertop fabricator needs the approved device specifications and exact cutout information before cutting the slab.
A large sink, cooktop or outlet opening can leave narrow countertop sections near an edge, seam or seating overhang. These areas require careful fabrication and continuous support where specified.
When several cutouts are requested, their combined effect should be reviewed rather than assessing each opening separately. Repositioning a device by a small amount may improve the remaining material, cabinet access and support layout.
Before Cutting the Slab
Confirm the exact sink, cooktop, faucet and outlet models; approved cutout dimensions; mounting method; ventilation; cabinet clearances; remaining stone and support requirements.
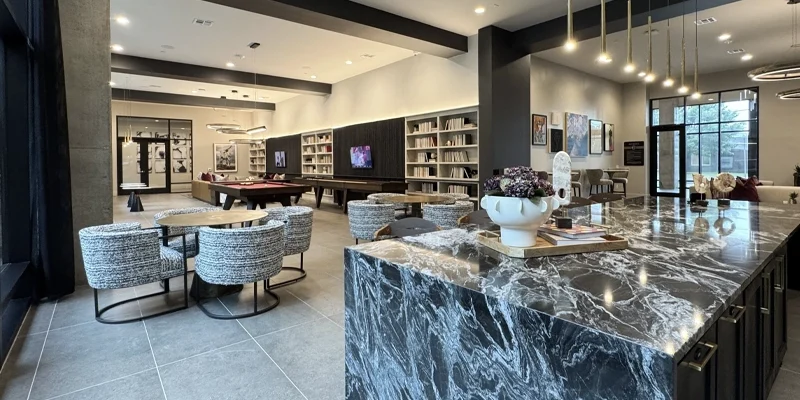
A standard island countertop leaves the cabinet ends visible, while a waterfall design continues the countertop material vertically down one or both ends. The correct choice depends on the room, slab, cabinet design, seating plan and project budget.
A standard design generally uses less slab material and requires fewer mitred joints. It also allows decorative cabinet panels, furniture-style ends or end seating to remain visible and accessible.
This option may be preferable when the cabinetry is an important design feature, when both ends are required for seating or when slab yield makes waterfall panels inefficient.
A one-sided waterfall can finish an exposed end while preserving seating or cabinetry at the opposite side. A two-sided waterfall creates a framed architectural appearance but consumes more slab material and may remove both ends from the seating plan.
Waterfall quantity should be decided before slabs are ordered. The top and vertical panels must be included in the layout so that sufficient material remains for the rest of the project.
Waterfall panels are commonly connected to the horizontal surface using precisely fabricated mitred joints. The quality of the result depends on cutting accuracy, edge construction, installation and how the pattern moves from the top onto the vertical panel.
A printed porcelain or engineered pattern may not continue through an exposed edge in the same way as natural stone. The planned joint should be reviewed using the actual product rather than assumed from a sample.
A waterfall may not be appropriate when it blocks required seating, conflicts with an outlet or finished panel, creates poor slab yield or adds visual weight to a compact room. It should improve the complete island rather than being added only because it is a popular detail.
Waterfall panels, mitred edges and pattern alignment can increase material and fabrication costs. Review the dedicated kitchen island countertop cost guide when preparing the project budget.
A seamless island depends on available slab dimensions, usable slab area, finished island size, cutouts and fabrication limitations. A slab may be physically large enough but still unsuitable if defects, pattern placement or required edge components reduce the usable area.
When a seam is necessary, it should be positioned over suitable support and away from vulnerable cutout conditions where possible. Its relationship with the visible pattern should also be reviewed.
The largest section that can be fabricated is not always the largest section that can be delivered. Doorways, stairs, corridors, elevators, ceiling height and turning space can determine whether the island must be divided.
Installation access should be assessed before the final seam plan is approved. A controlled shop-fabricated seam is preferable to an unexpected modification during delivery.
Strong veins can run lengthwise, cross the island or connect visually with a waterfall end. The best direction depends on island proportions, viewing angles, cutouts and the rest of the kitchen.
Natural stone should be approved from the full slab. For engineered or porcelain surfaces, confirm whether multiple slabs have compatible patterns, tones and production information.
True bookmatching uses corresponding slabs or pieces arranged to produce a mirrored pattern. Pattern alignment is a broader term for coordinating movement between adjoining pieces. Rotating unrelated pieces does not guarantee a bookmatched result.
Approve the Layout Before Cutting
Confirm the island top, cutouts, seam, waterfall panels, vein direction and pieces reserved for visible edges before fabrication begins.
The island can use the same surface as the perimeter countertops or become a controlled contrast. Both approaches can work when colour, pattern, thickness, finish and edge profiles are coordinated.
Using one material throughout creates continuity and can simplify maintenance. Slabs should still be checked for tone and pattern compatibility, particularly when the project requires several pieces.
A different island cabinet colour can create separation without introducing another countertop material. Repeating selected tones from the perimeter cabinets, flooring or backsplash helps the island feel connected to the room.
A contrasting island works best when the difference appears intentional. Coordinate at least one element—such as undertone, vein colour, finish or visual weight—with the surrounding kitchen.
Compare both materials under the room’s actual lighting before ordering. Samples viewed separately may look compatible but react differently when installed beside each other.
Before scheduling the final countertop survey and measurement, confirm that:
Approximately 36 inches may be used as a starting point for a general walkway, while working aisles commonly begin around 42 inches for one cook and 48 inches for multiple cooks. Appliances, seating and actual traffic may require more space.
Approximately 24 inches per person is a useful starting point. Wider stools, arms, waterfall ends and supports can increase the required width.
There is no universal answer. The exact product, thickness, cantilever dimensions, cutouts, cabinet structure and manufacturer or industry guidance must be evaluated.
The best material depends on use, appearance, maintenance, cutouts, edge design and budget. Quartz, granite, porcelain, quartzite and marble each involve different tradeoffs.
Neither is automatically better. A sink requires plumbing and cleanup planning, while a cooktop requires ventilation, safe clearances and appliance-specific coordination. The choice should support the kitchen workflow.
No. Slab dimensions, island size, cutouts, usable material, fabrication limits and delivery access may require a planned seam.
Sometimes. The answer depends on island dimensions, number of waterfall ends, slab size, pattern direction and yield. Waterfall pieces must be included in the slab layout.
Final measurement should take place after the cabinets, finished panels and structural supports are installed in their approved positions and fixture specifications are available.
A successful island countertop balances layout, seating, support, material, cutouts and fabrication. Confirming these details before measurement helps prevent avoidable changes after the slab has been selected or cut.
Planning a Custom Kitchen Island?
Teccorp Stone can help review your island dimensions, countertop material, overhang, support, cutouts, slab layout and installation requirements for projects across Toronto and the GTA.
Request a Free Quote
Kitchen Island Services
Browse Stone Materials